TOOL: VSCode配置ROS的使用
概述
vscode在linux下面也是一个比较好用的代码编辑器。由于我们经常要用到ROS,因此这里讲 述一下相关的配置。
vscode的所有配置文件都在~/.vscode目录中。很多人习惯搞多个ROS的工作空间,其实完全 没有必要,放在一个工作空间可以避免很多配置信息的切换。下面的vscode配置主要是ROS 的代码提示,编译,代码google风格格式化。
vscode配置ros插件
安装vscode
这一步可以直接上官网,根据官网安装就行。不同的版本可能有用一些差别,但是对于 配置方法应该是一样的。我用的是1.42.0
安装ROS插件
打开vscode,使用快捷键Ctrl+Shift+X,左边会有一个输入框,输入ROS,选择一下, 点击安装即可。
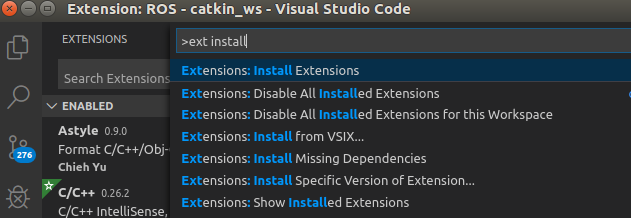
Figure 1: install plugin
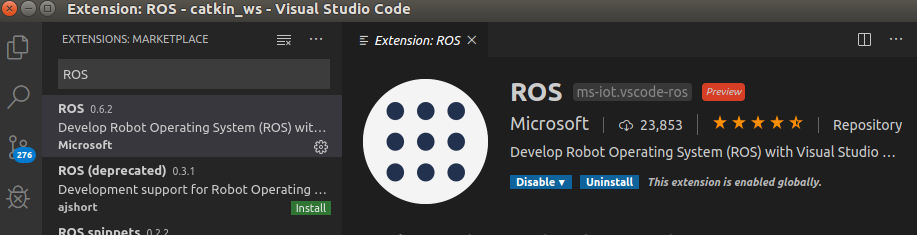
Figure 2: install ros plugin
安装C/C++插件
使用快捷键Ctrl+Shift+X, 在左边输入框中输入"c/c++"安装。
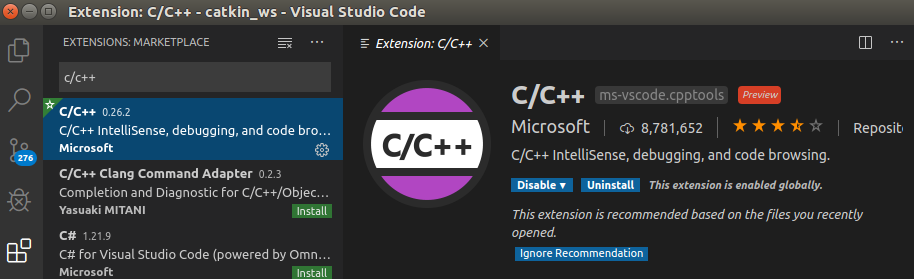
Figure 3: install c/cpp plugin
配置c/c++
Ctrl+Shift+P, 输入C/C++: Edit Configuration (JSON), 输入一下内容:
{
    "configurations": [
        {
            "name": "Linux",
            "includePath": [
                "${workspaceFolder}",
                "/opt/ros/kinetic/include"
            ],
            "defines": [],
            "compilerPath": "/usr/bin/gcc",
            "cStandard": "c11",
            "cppStandard": "c++17",
            "intelliSenseMode": "gcc-x64"
        }
    ],
    "version": 4
}
配置 catkin_make
Ctrl+Shift+P, 输入tasks: Configure Task, 会在~/.vscode中生成task.json文件, 修改如下:
{
    "version": "2.0.0",
    "tasks": [
        {
            "label": "catkin_make",
            "type": "shell",
            "command": "catkin_make",
            "args": [],//如果需要在命令后面加一些后缀,可以写在这里,比如-DCATKIN_WHITELIST_PACKAGES=“pac1;pac2”
            "group": {"kind":"build","isDefault":true},
            "presentation": {
                "reveal": "always" //可选always或者silence,代表是否输出信息
            },
            "problemMatcher": "$msCompile"
        },
    ]
}
使用
配置完成之后,打开工作空间目录文件夹。可以目录栏右键新建package和文件。 Ctrl+Shift+B进行编译。
astyle
- 安装astyle 3.1
- Ctrl+Shift+X 打开扩展工具页面,输入astyle,安装。
Ctrl+Shift+P 输入:Preferences:Open Settings(JSON),填入:
{
    "window.zoomLevel": 0,
    "astyle.executable": "astyle",
    // "astyle.astylerc": "${workspaceRoot}/.vscode/astylerc", //此处默认是```$HOME/.astylerc```(不填)
    "astyle.additional_languages": [
        "c",
        "cpp",
    ],
    "astyle.cmd_options": [
        "--lineend=linux",
        "--delete-empty-lines",
        "--style=google",
        "--indent=spaces=2",
        "--attach-namespaces",
        "--attach-classes",
        "--attach-inlines",
        "--add-brackets",
        "--align-pointer=name",
        "--align-reference=name",
        "--break-after-logical",
        "--pad-oper",
        "--unpad-paren",
        "--suffix=none",
        "--indent-switches",
        "--max-code-length=80",
        "--indent-after-parens",
    ],
    "[cpp]": {
        "editor.defaultFormatter": "chiehyu.vscode-astyle"
    },
    "explorer.confirmDelete": false,
}
下面cmd_options里面的内容可以放在一个其他地方取名astyle,然后在第三行 astyle.astylerc后面指定目录,这样cmd_options里面的东西就不需要了。
- Ctrl+Shift+I进行格式化。